TEST4U LMS integration
TEST4U is proud to announce a new integration tool for its TEST4U Training Platform.
A lot of our users asked us for an integration of TEST4U to their LMS, and we were happy to oblige.
The LMS integration using the LTI standard is implemented in TEST4U since version 15 of the TEST4U application.
It is now possible to assign the questions of a TEST4U skills category as an activity to your course. The student will then be able to complete a practice test on this category using TEST4U and their grade will be automatically transferred to your LMS.
This means that your school can take advantage of the TEST4U training system and organize or monitor these TEST4U activities from inside your familiar LMS environment.
Since this integration is using the LTI standard, it is possible to integrate TEST4U with any LMS software that supports it.
Integrate in Moodle
In this example we will show you all the steps to setup and use TEST4U from inside a Moodle LMS site.
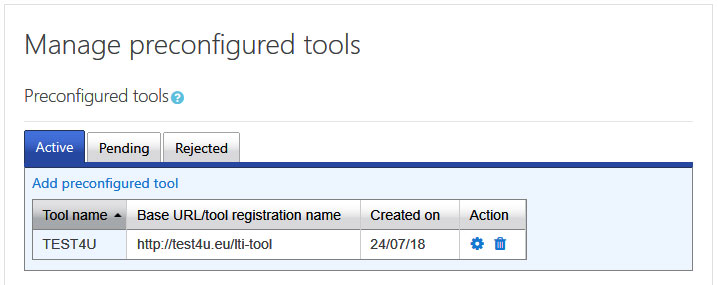
First you need to create a preconfigured tool.
Go to Site administration → Plugins → Manage activities → External tool settings
There you will see a list of all your preconfigured tools. Click on Add Preconfigured Tool.
Fill in the form with the information provided by the technical department.
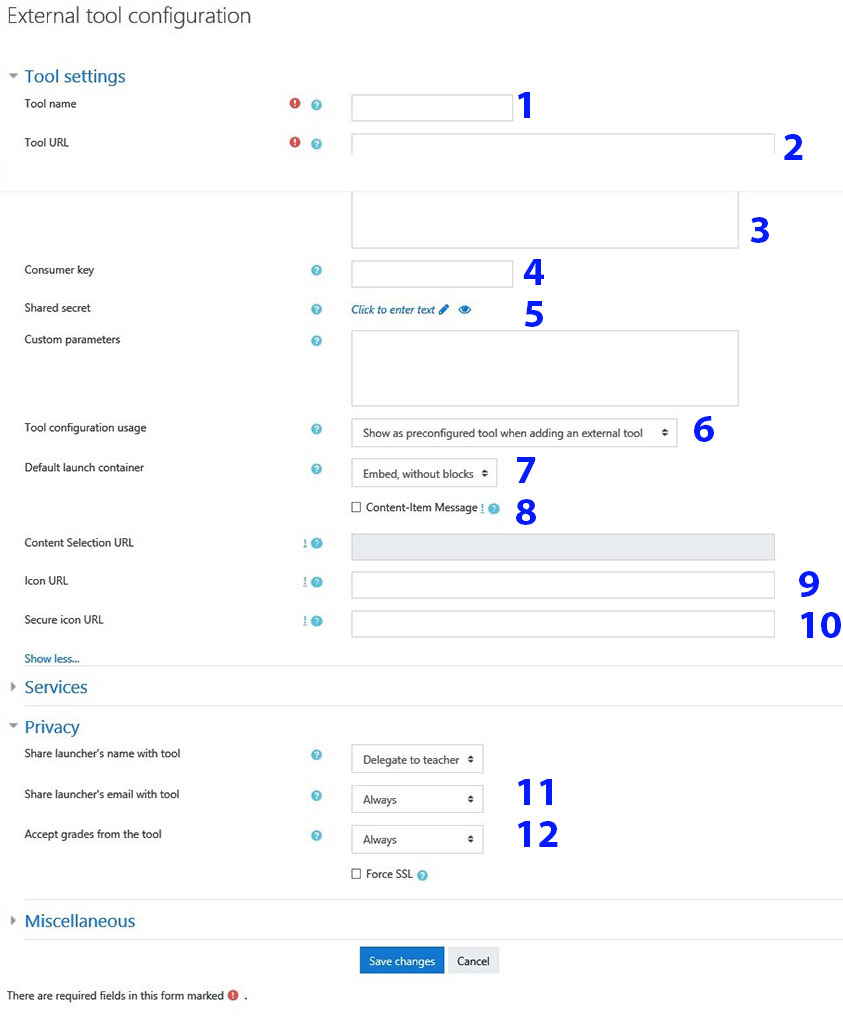
Tool name: We propose to use the name TEST4U but you can give whatever name you want. This is the name that will be shown in the activity list.
Tool URL: Provide the launch URL. This is the current page: https://www.test4u.eu/lti-tool
Tool description: This field is optional. Providing a description will help your teachers to identify the TEST4U LTI tool more easily.
Consumer key: The consumer key is your school’s TEST4U registration email address.
Shared secret: This is your consumer secret. If one hasn’t been provided for you during your school’s registration apply for one using our ticket system: Create Ticket
In the Custom Fields add the text school=<school_id> where <school_id> will be the id of your school which will be sent to you along with your Shared Secret.
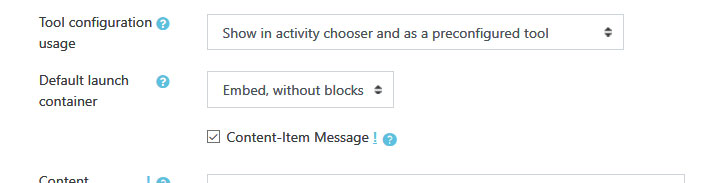
Tool configuration usage: Here choose Show in activity chooser and as a preconfigured tool to be able to access TEST4U from the activity chooser.
Default launch container: We recommend to choose Embed, without blocks.

Content-Item manager: This has to be selected for the teachers to be able to customize the test content to their needs.
Icon URL: Just leave blank.
Secure icon URL: We recommend you use the official TEST4U icon http://www.test4u.eu/img/test4u_brand.jpg, but you can use any icon you want or just leave blank.
Share launcher’s email with tool: This needs to be set on Always to be able to assign TEST4U subscription to the student’s email.
Accept grades from the tool: This needs to be set on Always for Moodle to be able to receive the test results from TEST4U

Click the Save changes button to accept the configuration and you are done.
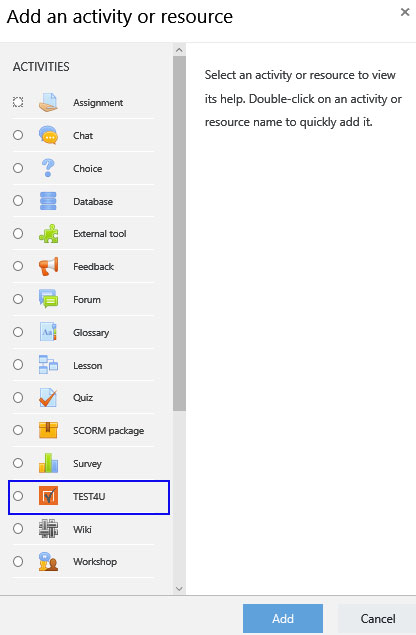
Now you can go on and add an activity to your course. We have created an empty course and we will add an activity to it.
The activity list selector is shown where we can see TEST4U among the other activities. We click on it, we select a name for our activity and click on Select Content.
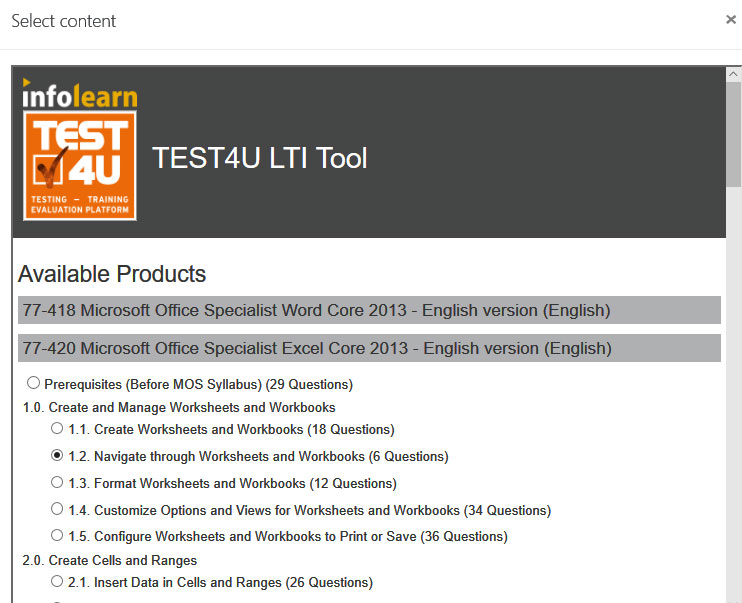
A list of all the available products of your school appears. There you can select any skills subcategory to assign in the activity and then click on SAVE.
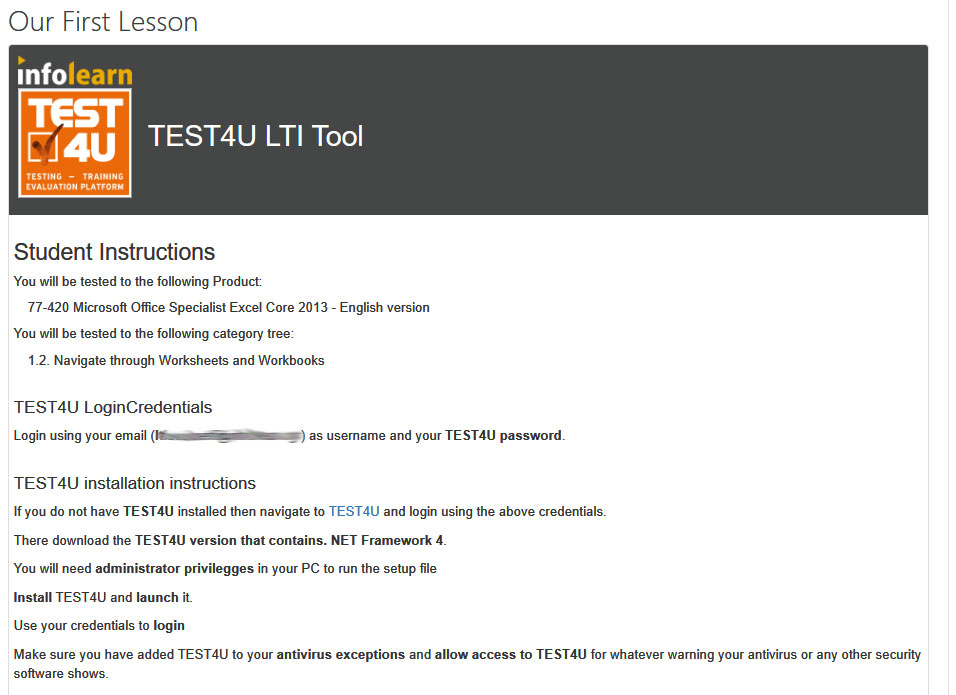
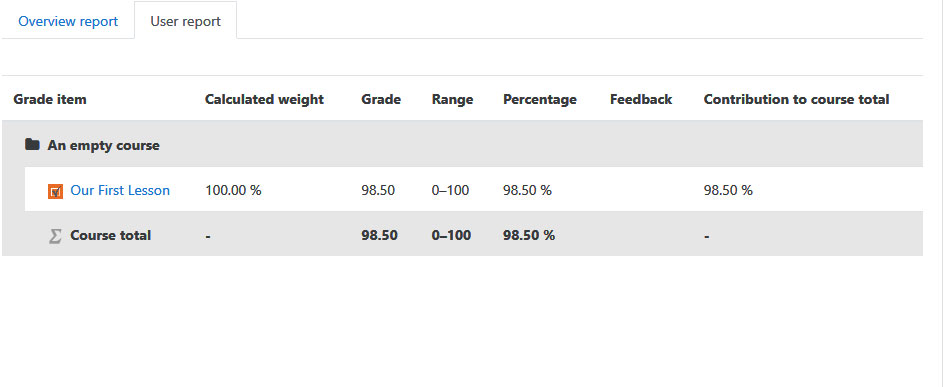
That’s it. Your activity is ready. If you click on Save and Display you will see a sample of what a student will see.
This assignment is accessible to students who have enrolled in your course. The students can connect their accounts to this specific TEST4U assignment by clicking on the assignment. This is how they will see a brief description of what the activity is about, along with instructions of how to install TEST4U. Their TEST4U usernames and temporary passwords are displayed, in case they are new TEST4U users.
Once the TEST4U installation is complete, students may login, using their credentials. Once students login, they will have access to the list of all the activities their teachers assigned to them.
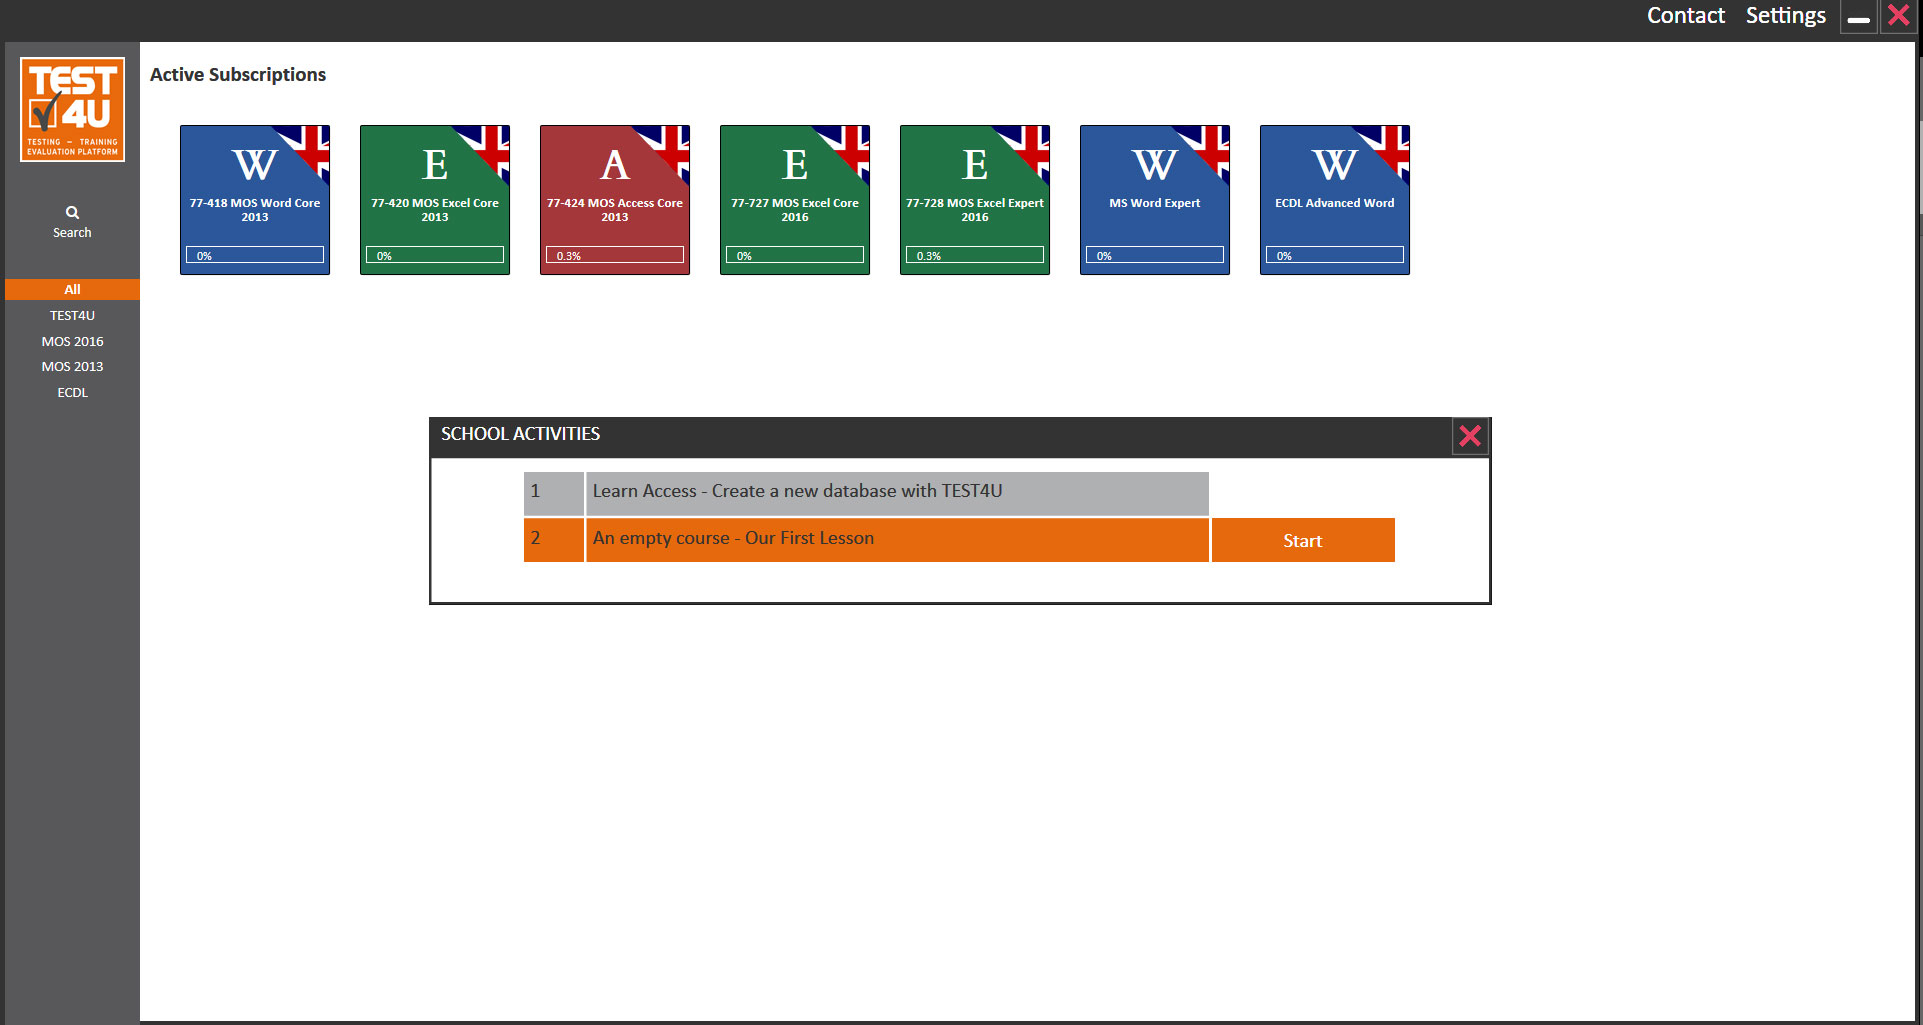
They can start solving the questions displayed, by selecting one of them. At the end of the test their final grade will be sent to the Moodle LMS for them or their teacher to see.
We are waiting for your feedback on this new feature of TEST4U with comments for additions or improvements.
Want to learn more? Contact us.
Integrate in Canvas
In this example we will show you all the steps to setup and use TEST4U from inside a Canvas LMS site.
First you need to create an External App.
Navigate to Settings>Apps>View App Configurations
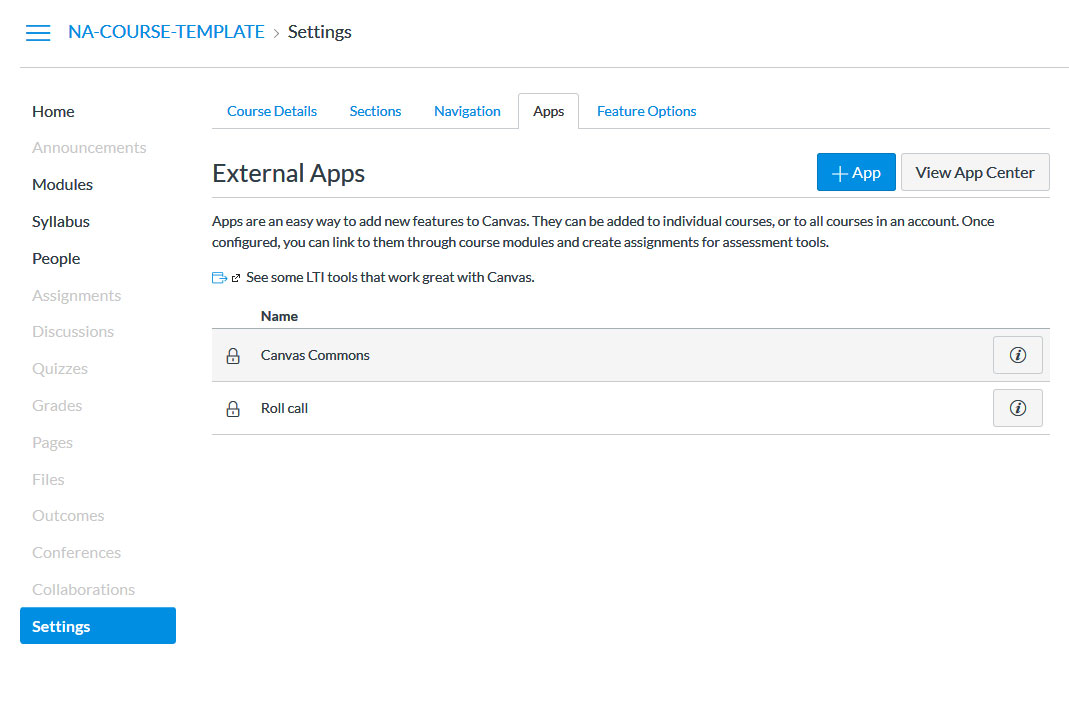
There you will see a list of all your External Apps. Click on +APP button.
Fill in the form with the information provided by the technical department.
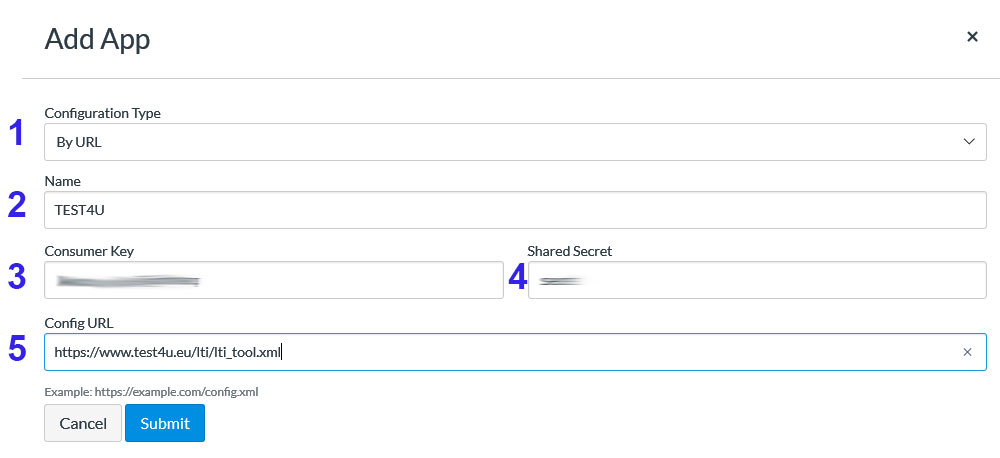
Configuration Type: Select the By URL option.
Name: We propose to use the name TEST4U but you can give whatever name you want.
Consumer key: The consumer key is your school’s TEST4U registration email address.
Shared secret: This is your consumer secret. If one hasn’t been provided for you during your school’s registration apply for one using our ticket system: Create Ticket
Config URL: This is the URL you will use for the configuration: https://www.test4u.eu/lti/lti_tool.xml
After you complete the form you can click on Submit.
You can now see the TEST4U app in your External Apps list.
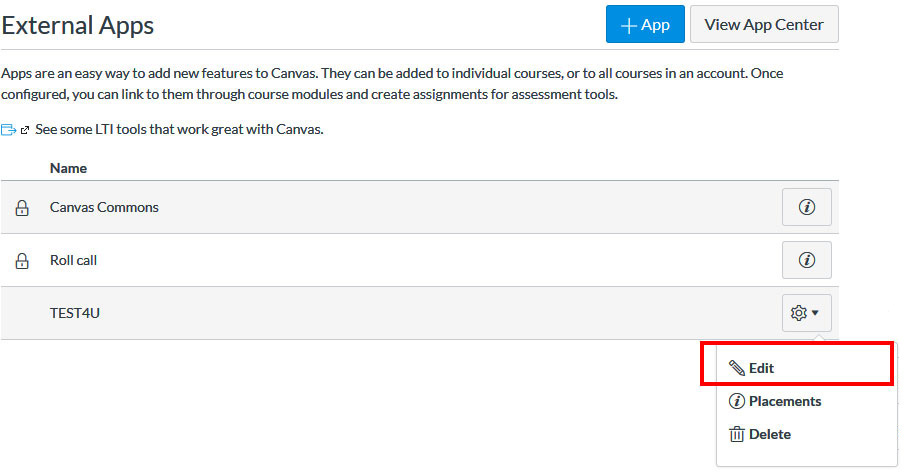
From the settings icon of the TEST4U app select the Edit option
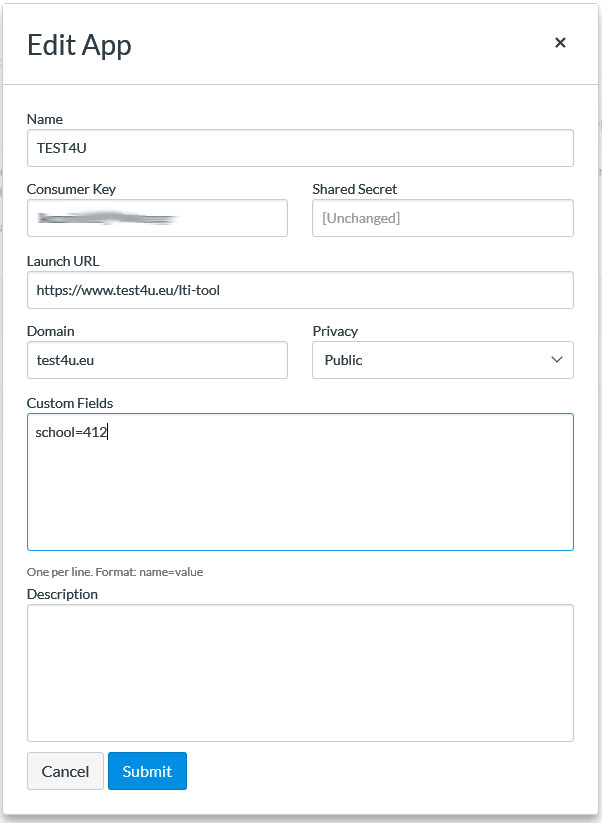
In the Custom Fields add the text school=<school_id> where <school_id> will be the id of your school which will be sent to you along with your Shared Secret.
Click on Submit and you are done.
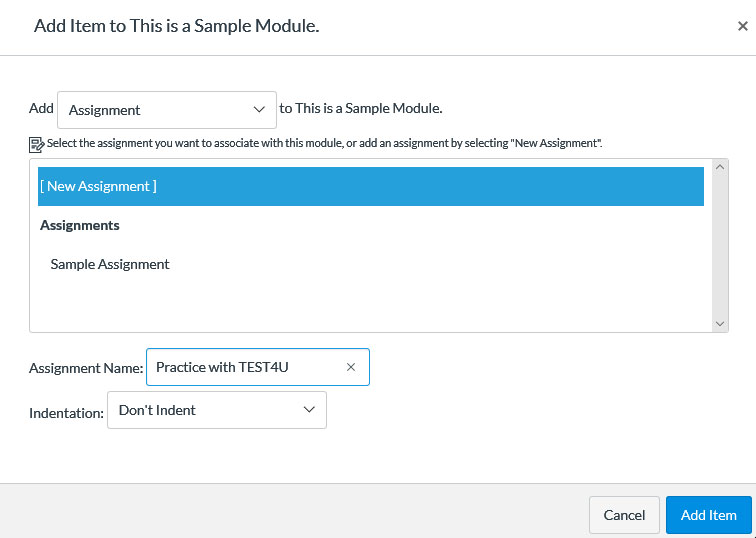
Now you can go on and add an Assignment to your course. We will use the Canvas sample course and Module.
You navigate to the course and click on the plus (+) button to add a new assignment.

In the sample new Assignment, we have used the name Practice with TEST4U
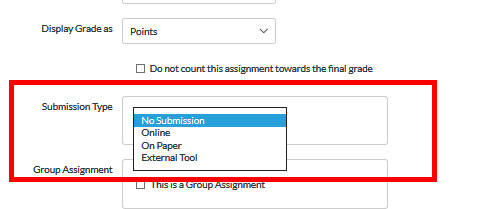
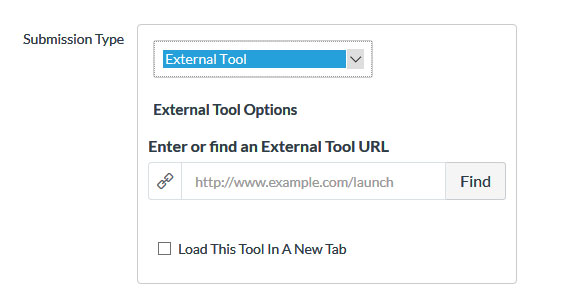
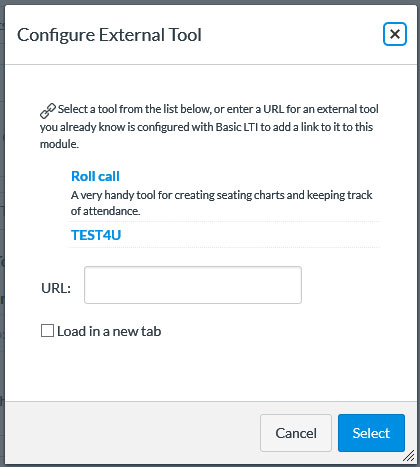
In the assignment edit page we select the External Tool as Submission Type.
Then you click on find and select the TEST4U tool from the list.
Don’t forget to add Points to your Assignment if you want TEST4U to return a grade.
A window will popup asking you to choose the question category to be included in the assignment.
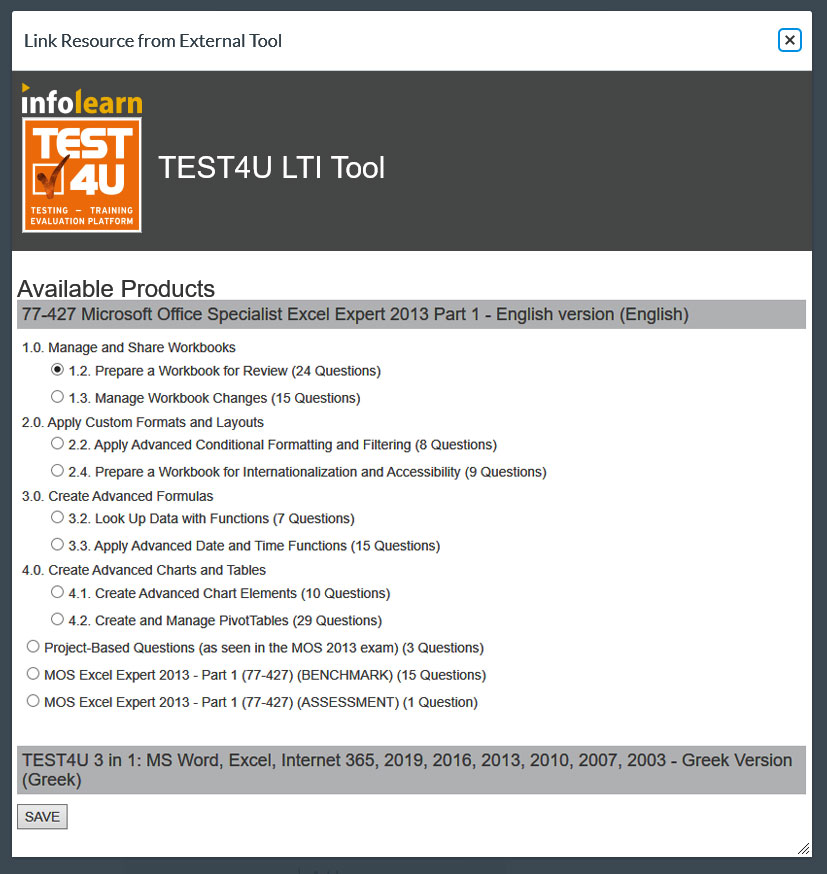
This category can be any of the categories that are included in the products your school has subscribed for.
When you save the assignment a sample page of what the student will actually see will appear.
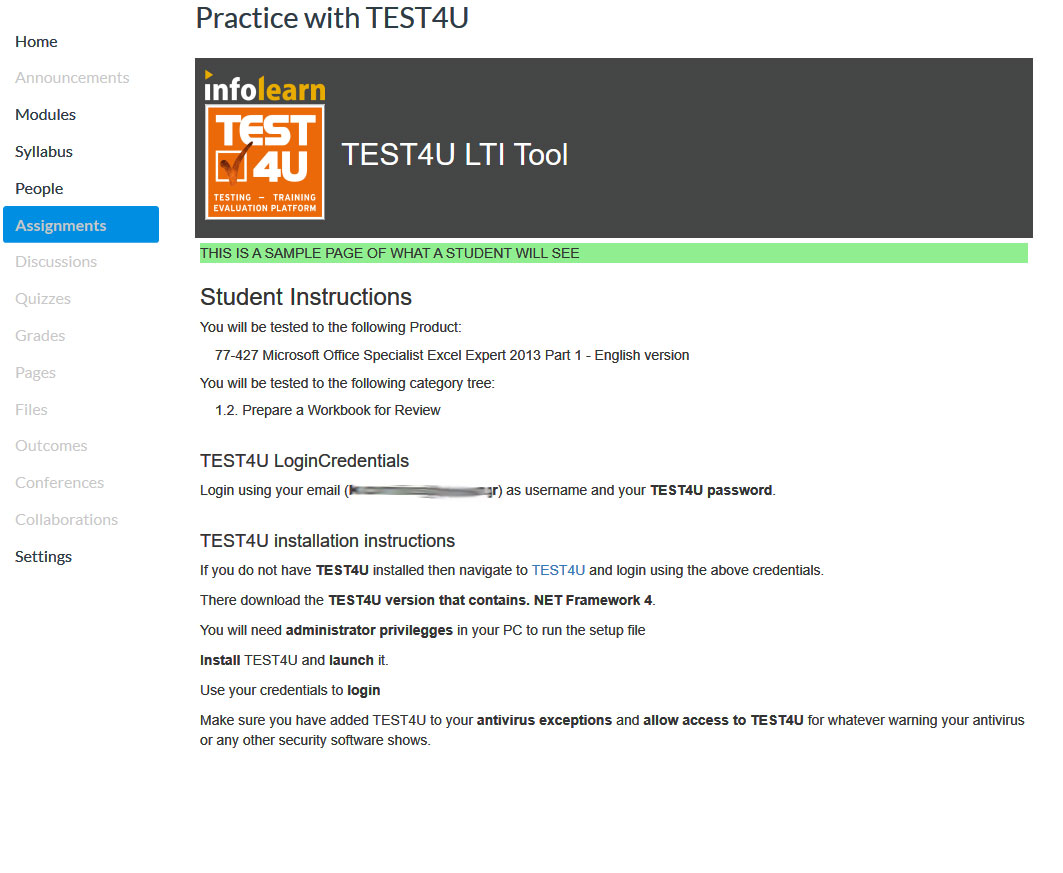
This assignment is accessible to students who have enrolled in your course. The students can connect their accounts to this specific TEST4U assignment by clicking on the assignment. This is how they will see a brief description of what the activity is about, along with instructions of how to install TEST4U. Their TEST4U usernames and temporary passwords are displayed, in case they are new TEST4U users.
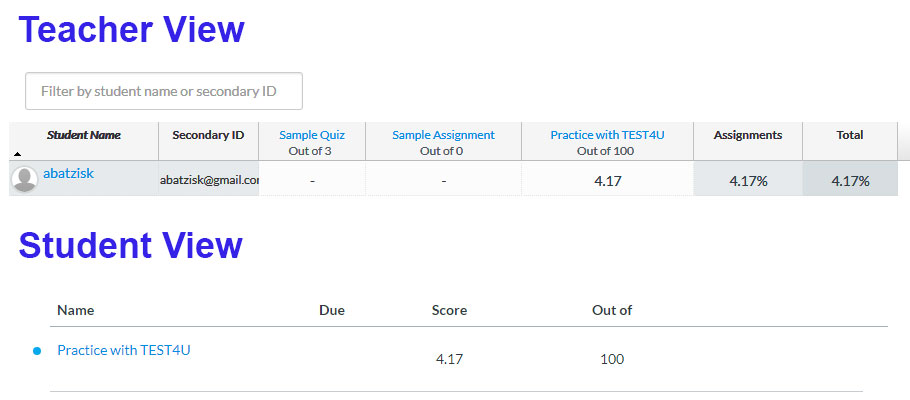
Once the TEST4U installation is complete, students may login, using their credentials. Once students login, they will have access to the list of all the activities their teachers assigned to them.
They can start solving the questions displayed, by selecting one of them. At the end of the test their final grade will be sent to the Moodle LMS for them or their teacher to see.
We are waiting for your feedback on this new feature of TEST4U with comments for additions or improvements.